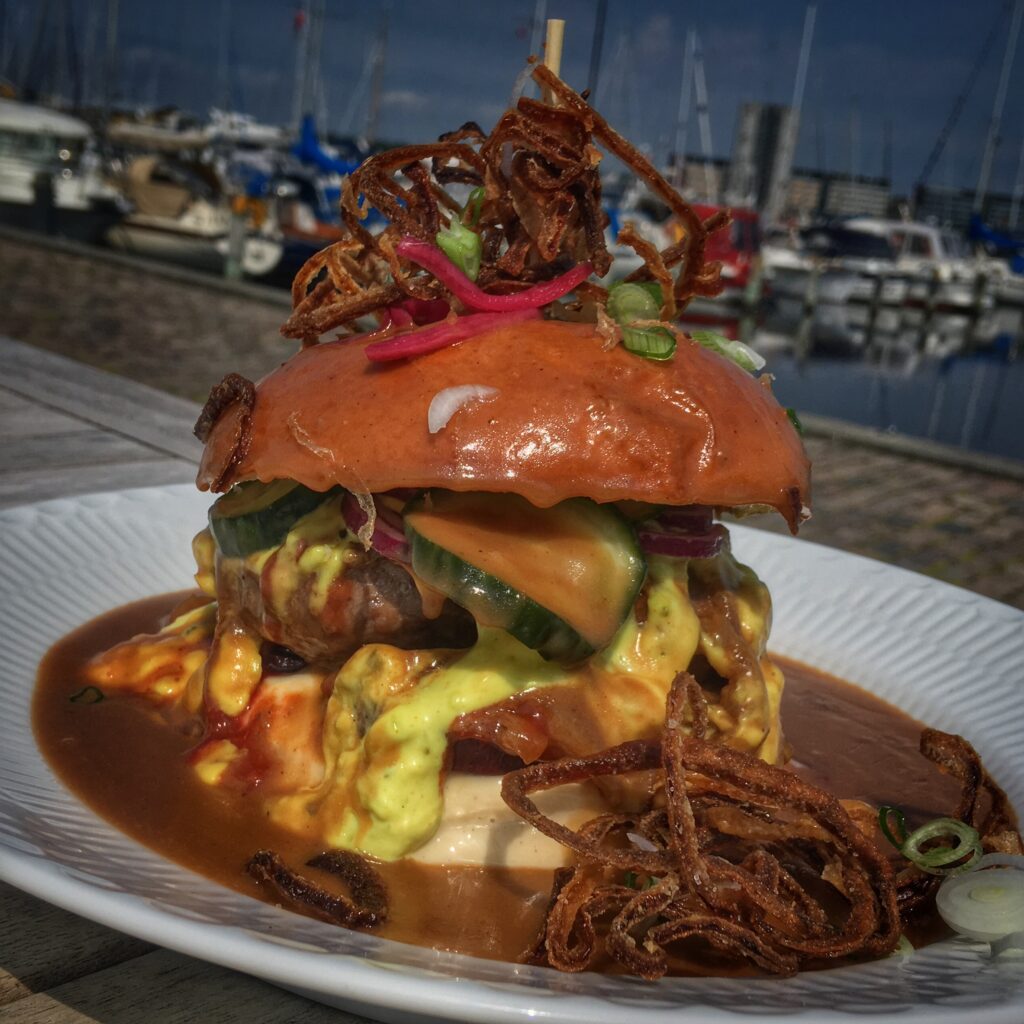
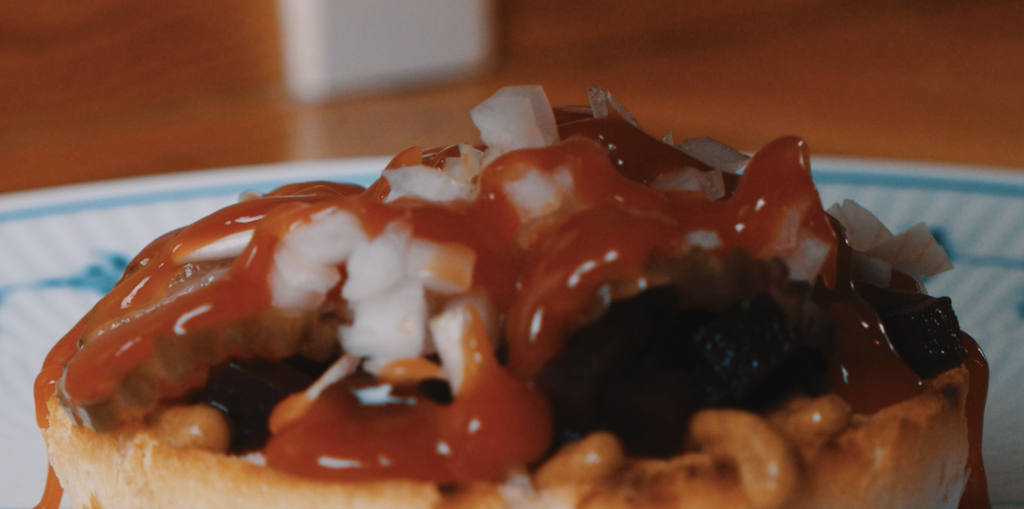
What the **** is a bøfsandwich?
The gravy burger – or bøfsandwich in Danish – is one of the greasiest burgers around. And it’s Denmark’s original spin on the hamburger. Doused in gravy.
It was introduced in 1949, North of Copenhagen – originally without the gravy. The gravy was added in the late 1950s in the Jutland region of Denmark, for two reasons: One, as an attempt to marry the hamburger with a classic Danish dish: The pan-fried minced beef patty served with soft grilled onions, brown gravy, and potatoes. And the other reason, was that no pølsevogn (hot dog stand) – where the bøfsandwich was originally sold – had griddles. They only had burners for boiling red pork links, so they grilled the beef patties at home, brought them to the pølsevogn, and kept them warm in the gravy on the burner. Ingenious fix, delicious outcome.
This tasty frankenstein comfort food made the bøfsandwich very popular in this region for decades. With very few exceptions, serving a bøfsandwich with gravy only made it to Copenhagen in the 2010s – and to many Copenhagerners it’s still considered somewhat of a fastfood bastard. And honestly, it may look somewhat vulgar and you do need a knife and a fork to eat it, but rest assured – this is true viking grease.
The bøfsandwich has been designed to overload your senses, with heaps of umami, complementing the other four basic tastes – sweet, sour, bitter, and salty. Added to that is also crispiness from the fried onions on top against the soft buns, so it has a really satisfying mouthfeel. And once you’re done eating a bøfsandwich – to really process it all – you’ll need a nap and shower.
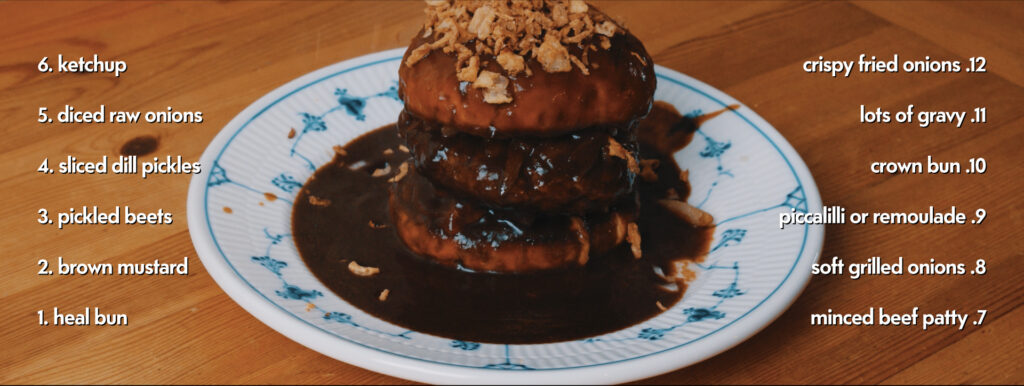
What’s in a bøfsandwich?
To build a bøfsandwich, you’ll need all of these elements listed below. If you scroll down you’ll find recipes for most of the items – and the rest should be easy to get your hands on.
If you plan on trying your luck with the bøfsandwich in your own kitchen, it’s is highly recommended to read through all the recipes below, so you have an idea of what you need to prepare or buy in advance . Always refer back to the video above, to get an idea of what goes on when – and how to assemble your delicious and greasy bøfsandwich, once you’ve prepared all the different elements.
- Heel bun
- Brown mustard
- Pickled beetroots *
- Sliced dill pickles *
- Raw onions
- Ketchup
- Minced beef patty
- Soft grilled onions **
- Remoulade or piccalilli *
- Crown bun
- Brown gravy **
- Crispy fried onions *
*) Should be prepared at least 24 hours in advance
**) Can be prepared in advance and reheated
Recipe: This is how you make the ingredients for a bøfsandwich
Some of the ingredients, namely everything that’s pickled, as well as the crispy fried onions, are best prepared if it’s made at least a day in advance.
Buns
The ideal bun for a bøfsandwich, is a relatively soft one – perhaps a brioche bun or a potato roll. Make sure you toast it, before you assemble the bøfsandwich. If you’re really advanced – and of course you are – once you’ve cut the bun, you butter the insides and toast them on your pan.
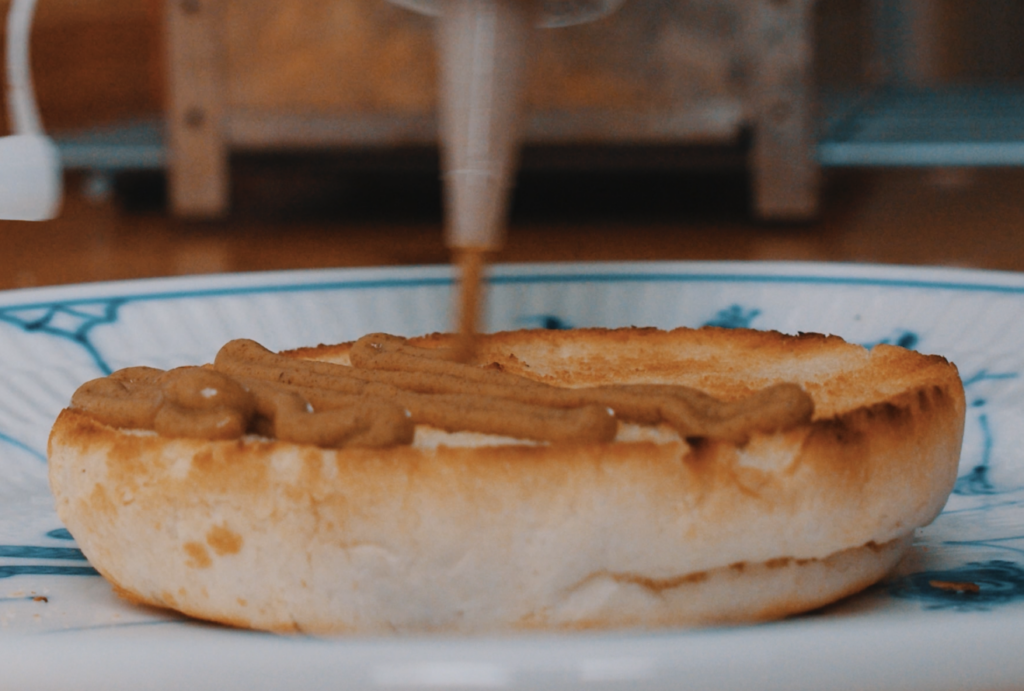
Brown mustard
What you want here is a pungent brown mustard that can cut through all the fatty flavours. A dijon may be a little on the strong side? That’s your call. While you can use a yellow mustard, its taste profile is typically a little more on the tangy side – and we already have loads of acidity in this beast.
Pickled beets
Pickled beets ingredients
1 kg (2lbs) of raw beetroots, 1L (35fl.oz) of water, 1 tbsp of salt, 750ml (26 fl.oz) of wine vinegar, 500g (1lbs) of sugar, 5 bay leafs, 10 whole peppercorns, 2 dried star anises.
Wash the beets, and trim off the beet greens and long roots. Boil the whole beets for about 35 minutes in the water with the salt added. Pour out the hot water and put the pot with the hot beets still in it, under running cold water for around 5 minutes. This sudden temperature change makes the beets extra tender. Peal them and cut them into dices, less than 1cm (0.4inch) on all sides. In an empty pot, add the vinegar, sugar, bay leafs, peppercorns, and star anise – and bring it to a boil. Then add the diced beets and bring it to a boil again. Let it cool a bit before transferring to jars. Make sure to sterilize your jars, before adding the pickled beets.
Sliced and pickled cucumbers (agurkesalat)
Traditional Danish agurkesalat (translates to cucumber salad) is a classic Danish condiment, used for many dishes, including the world’s best tasting hot dog – the classic Danish hot dog.
Agurkesalat ingredients
3 cucumbers, 0,5L (16fl.oz) vinegar, 0,5L (16fl.oz) water, 500g (1lbs) sukker
10 peppercorns, 2 bay leafs.
In a pot, add the water, vinegar, sugar, peppercorns, and bay leafs. Slowly bring it to a boil while occasionally stirring, taste it, and balance it with salt and pepper. Then let it cool back down to room temperature. Slice the cucumbers into really fine slices, 1-2mm (0.06inch) thick. If you have a mandoline slicer, it’s perfect for this job. Add the cucumber slices to a sterilized jar and pour the heavenly – and not hot – liquid over, until all the cucumber slices are covered. By waiting until it’s cold, you retain the crispiness of the cucumber.

Raw onions
Cut a raw onion into small dices. If you want to cut it like a pro, it’s actually not that hard – just take a look at the video below here. And it’s okay to cry, but a pair of ski goggles can help you tremendously.
Ketchup
When you buy a bøfsandwich at the best purveyors in Denmark, ketchup is the one element they almost never make themselves, because it’s so much effort for something that – at best – tastes as good as the best brands. Ketchup is a universal condiment and typically not worth the effort to make at home. Buy a good one – maybe even organic – and you’ll be fine for this recipe.
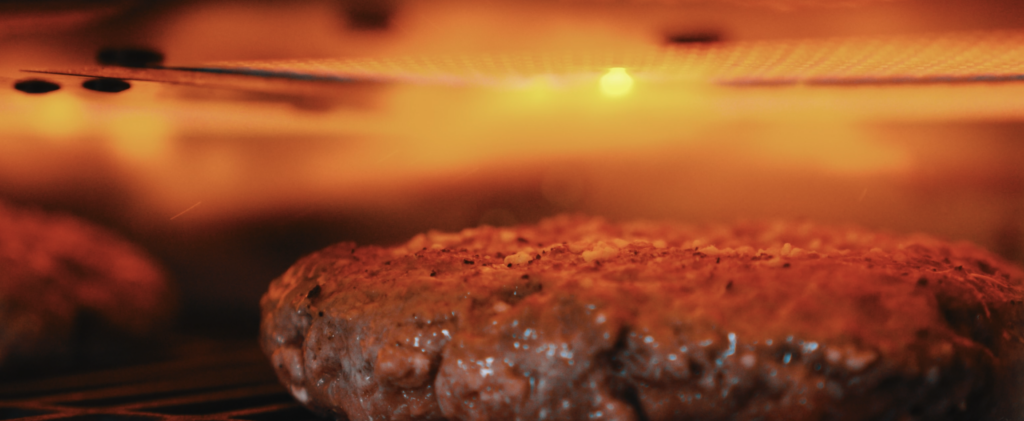
Minced beef patty – the heart of the gravy burger
Always get your hands on a quality blend of minced beef. Many recommend around 20% fat, but certainly not less than 15% as your hamburger will become too dry. And you want it juicy, just like Bossman (RIP) said. There’s a 1000 ways to grill your hamburger – and none is more true than any other, as long as you make sure it has a juicy center, a nice crust, and adequately salt and pepper.
In the video above here, the 200g (7oz) hamburgers are grilled using an OFB grill from Otto Wilde. The Over-Fired Broiler grills at 800˚ celsius (1500˚F), which makes a really nice crust, while it’s still medium cooked and juicy in the center. Love it! Other great tasting ways, could be doing 2x 100g patties done ultra smash (without the cheese) to double the crust (more umami, yay!) for one bøfsandwich.
And what’s this – no cheese? Well, to be honest the bøfsandwich comes so loaded with fatty and pleasant umami flavours, that cheese really doesn’t do much for this bad boy. So there. We said it: The bøfsandwich is better off without cheese. And no true Danish bøfsandwich ever had cheese in it.
Soft grilled onions
Ingredients for soft grilled onions
3-4 big onions, 2 tbsp cooking oil, 50g (2oz) butter, salt, 1 tsp of pepper, 1 tbsp of sugar.
Peel the onions and slice them pole-to-pole (click here if you’re in doubt about what that means). Set your pan to medium temperature and add the oil. Once it has heated up, add the onions. Stir frequently. After about 5 minutes when the onions start to look translucent, add salt and freshly ground pepper. Your onions should brown lightly – if they’re already quite brown, it’s on too high heat. After a couple of minutes, add the butter and let it melt. Once it’s melted, drizzle the sugar all over. Keep stirring. Another couple of minutes, you can put it on low heat and leave it to reduce for 20 minutes or so, stirring frequently.
Is this called caramelized onions? Well, to most Danes that would likely mean something different and there’s really not a lot of sugar in this recipe. It’s probably somewhere between sweated and caramelized onions. So yeah, they’re definitely related – perhaps like a marriage in the Southern Appalachians?

Remoulade (or piccalilli)
To make remoulade, you need to make a piccalilli (recipe below) and then mix that with mayo (see below). Serving the unfiltered piccalilli works in addition to using remoulade and typically adds a little more punch – but remoulade is the historic ingredient of the two, if you wish to go classic Denmark on your bøfsandwich.
Beware of readymade remoulade or piccalilli
You can buy jars of piccalilli, but if you do that, go for the more yellow ones, that typically are more on the tangy side – which is exactly what you want. While you can buy remoulade or remoulade sauce outside of Denmark, it’s not recommended, as they’re almost always a style of tartar sauce for fish dishes – and a different tasting experience, than what we’re going after. The bright yellow Danish remoulade is very rarely found outside of Denmark, unless you know a Scandinavian specialty store, like ScandiKitchen in the UK – or ScandinavianButik in the US (we’re not affiliated or in any way associated with either).
Piccalilli ingredients
250g (1/2 lb) peeled pickling onions, 250g (1/2 lb) cauliflower florets, 250g (1/2 lb) de-seeded cucumber, 250g (1/2 lb) carrots, 340g (12oz) coarse rock salt, 750ml (1.25 pint) wine vinegar, 1 tbsp English mustard powder, 1 tbsp ground ginger, 1 tbsp ground turmeric, 1 tbsp whole yellow mustard seeds, 175g (6oz) sugar, 2-3 tbsp cornflour.
Break or cut up the veggies in to small pieces less than 1cm (0.4 inch) across, peel and deseed if necessary, and put all of it into a non-metallic bowl. Sprinkle the salt over the top, toss together, cover and leave in a cool place for about an hour. Then put the vinegar into a large saucepan, add the spices and bring to a boil. Drain the vegetables and rinse well under running water for 3-5 minutes. Add them to the simmering vinegar and cook over a low heat for 25 minutes or until the vegetables are tender. Add the sugar and continue to simmer for a further 1-2 minutes. Mix 2 tbsp of cornflour with a little water and blend into the hot vegetables. Bring back to the boil and cook for a further minute, the mixture should be glossy and thick. Add the remaining cornflour in the same way if necessary to thicken. Remove the piccalilli from the heat and leave to cool. Spoon into jars and store in a cool dark place for a at least a couple of days before eating.
Mix the remoulade
To make the remoulade, first you chop or coarsely blend your piccalilli so it only has tiny pieces, like in a russian dressing. Then you simply mix one part piccalilli with one part mayo. If you don’t make your own mayo, please buy a quality one to use as it really enhances the remoulade experience. Add two pinches of sugar and stir until it’s dissolved. Then add a pinch of turmeric to give it a nice yellow-ish colour. Salt and pepper to taste. Store it in a jar in the fridge for a couple of days – this enhances the yellow color and meshes the flavors better.
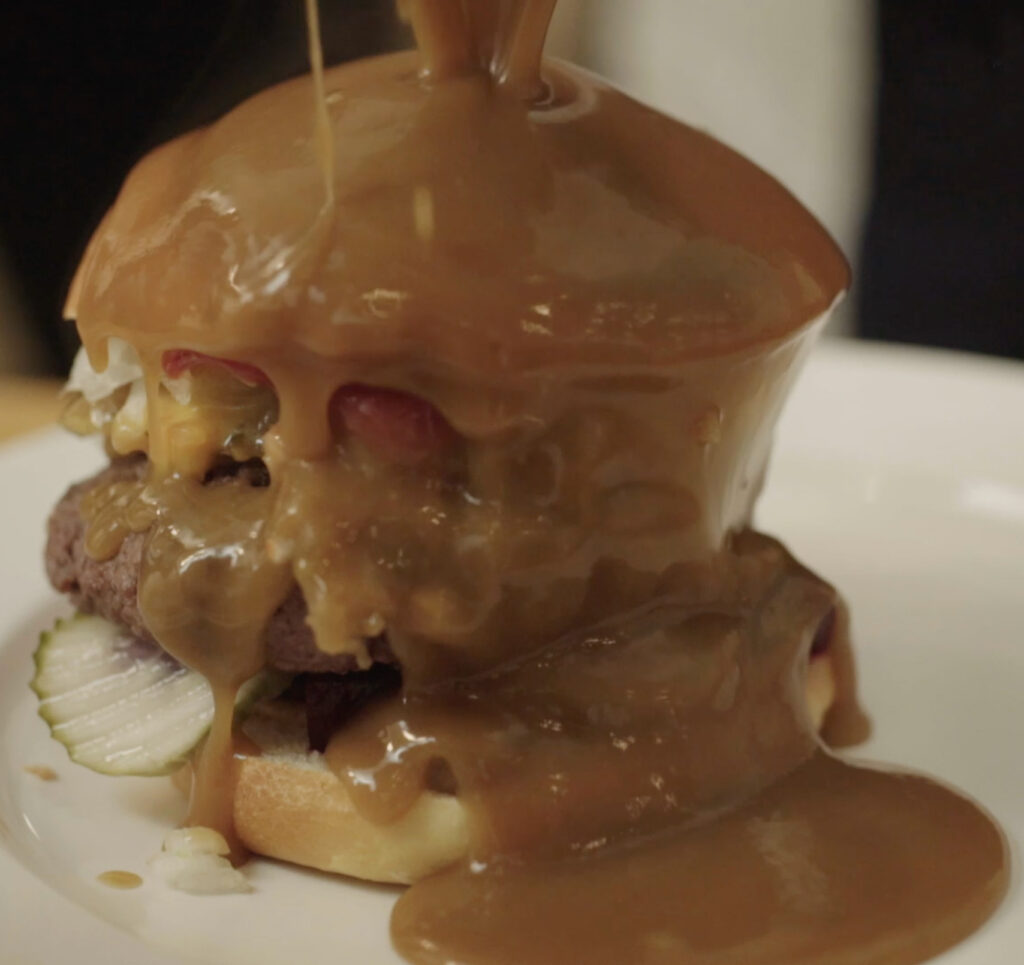
Gravy
For this recipe we’ll make a quick but nicely tasting gravy, based on what else we’re making with the bøfsandwich – namely the grilled onions and the hamburger. If you have leftover brown gravy, that’s also an easy way but totally legitimate way to go! If you’re looking to get advanced with the divine brown liquid, try making a sauce espagnole, sauce bordelaise, or a demi-glace from scratch. It’ll take some time and effort, but you’ll get a much richer and deeper tasting experience.
Gravy ingredients
1 craft beer, pan deglaze from the grilled onions, pan deglaze from the minced beef patties, beef or vegetable stock, salt, pepper, 1 tsp cornflour. Optional: 2dl (7fl.oz) of cream, caramel coloring.
After you’re done making the soft grilled onions, use half a beer to deglaze the pan. To deglaze a pan, you simply pour in liquid, bring it to a boil, and scrape off any residue from what was cooking on the pan. Transfer this deglaze to a small sauce pan, add the vegetable stock, and leave it simmering on low heat while you’re using the pan for grilling the hamburgers. Repeat the deglazing process after you’re done with the hamburgers. Dissolve the cornflour in water and add that to the sauce pan to thicken – bring it to a boil. At this point you can also add cream, to give a rounder and more rich taste. Or more beer, if there’s anything left? Probably not, but if you open a second one, you’ll just have to finish that one yourself. How unlucky. Anyway, adjust the color with some caramel coloring, so you get that nice brown hue. Bring to a boil and let it reduce a bit, before you adjust the taste with salt and pepper. And pour your pan sauce – gravy – over the top of the assembled beast of bøfsandwich! The baptism of a bøfsandwich!
Inside tips on the gravy
- Do this step, as the last (before putting crispy fried onions on) right before serving! That way the first bøfsandwich won’t get soggy, while you’re assembling the second one.
- Make sure your gravy is HOT! This sandwich contains a lot of elements that aren’t heated, so if the sauce is lukewarm when you apply it, you’ll soon find yourself eating a half cold bøfsandwich, which certainly doesn’t enhance the experience.
- Consider using leftover pork roast gravy, as that has a different flavour profile which complements the bøfsandwich!
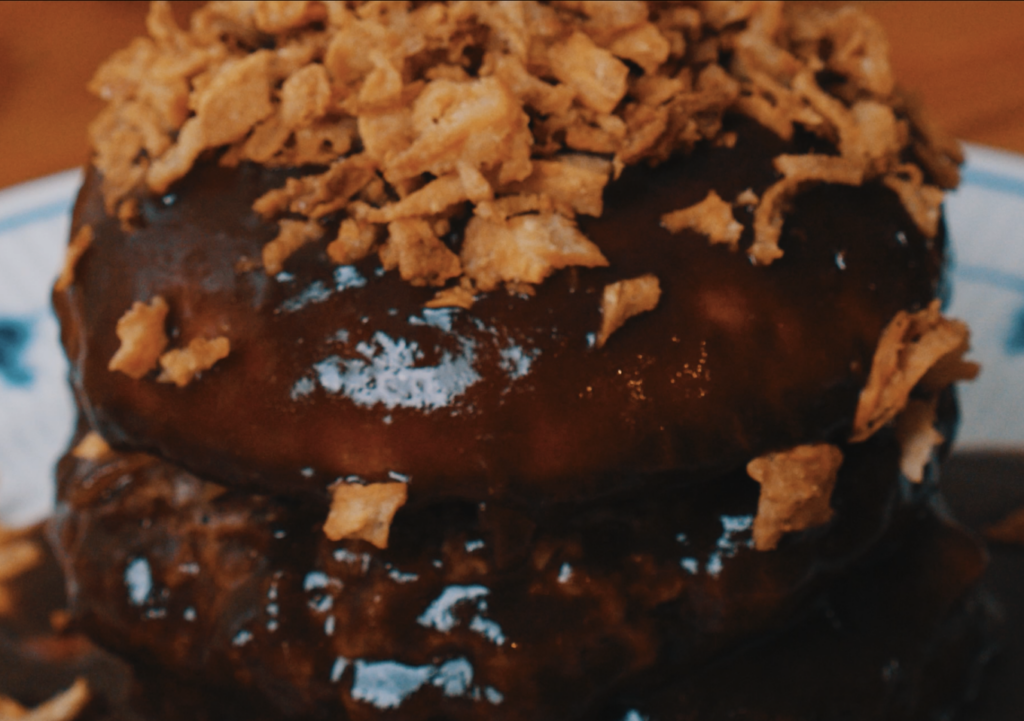
Crispy fried onions
Crispy fried onions ingredients
3-4 large onions, 200 g white flour, fine salt, pepper, 1L of frying oil.
Peel and slice the onions finely in rings. It’s very important that the onions are cut almost paper-thin. Again, if you have a mandoline slicer, it’ll make your life a lot easier for this task. Toss or use your hand to separate all the cut onions, so they don’t stick together as much. Put the oil in a pot and heat it to between 130-150°C (270-300°F). If you have a deep fryer, even easier! If the oil gets hotter than this, the onions will get scorched which tastes extremely bitter – don’t go there.
While the oil is heating up, prepare the onions. Put all the flour in a dish or casserole, add a pinch of salt and pepper and mix it. Next you add the onions, so they get covered in this mix. Now you’re ready to start frying – but have a dish with paper towel ready, next to frying pot. Once the oil has the correct temperature, shake a small batch of onions to remove excess flour and put them in the oil. Too many onions will lower the temperature too much, which means they’ll start sucking up too much oil. You don’t want that. When they have a light brown color, take them out of hot oil with a wire skimmer or the like, and let them rest on the paper towel which will suck up any excess oil.
Once you’re done with all the onions, leave them to cool completely to room temperature. At this point, it’s easy to crush them into smaller pieces with your hands. Do they need to be in small pieces? Not per se, but it’s easier to get some in every bite of bøfsandwich, which is what you ideally want.
Inside tips on the crispy fried onions
- Store them in a dark place at room temperature in a completely airtight container, or they’ll go soft relatively fast.
- If you’re not interested in having your place smell like fried onions for a couple of days, most Asian supermarkets stock these.
Enjoy – or velbekomme as we say in Denmark
Who are De Brune Riddere?
De Brune Riddere (translates to The Brown Knights), is a small non-profit outfit, that spend their free time and own money, traveling, tasting, and rating the best tasting gravy-doused bøfsandwiches in all of Denmark. Their mission is called: Danmarks Bedste Bøfsandwich (the best bøfsandwich of Denmark) and all their reviews are posted on facebook. Once per year in January they announce the best tasting one of the previous year on national Danish television.
It was back in 2012 that De Brune Riddere was founded by two guys, and somewhat randomly ended up announcing the national winner on national television in Denmark. That led to the winner being completely overrun for the next months (!), leading them to expand their kitchen facilities in order to keep up with demand. The yearly winner usually has a considerable increase in revenue – often in the range of a 40-50% increase. Thus, because of the media attention and popularity, it’s become an extremely sought after prize, with the best establishments making almost all the elements from scratch. That wasn’t the case, when the De Brune Riddere started back in 2012, where the best establishments typically would make their own gravy and use fresh ground beef for the patties. The bøfsandwich has come quite some way since.
Since De Brune Riddere started this endeavour, the gravy-doused version of the bøfsandwich has spread from Jutland peninsula to the rest of Denmark as somewhat of a cult phenomenon. In Denmark, De Brune Riddere are considered the most capable authority on the history and facts surrounding the bøfsandwich, and have been featured in leading magazines, radio, and television countless times.
Get in touch
If you’d like to get in touch for interviews, in-depth questions, or other opportunities, please get in touch through formand ( at ) debruneriddere ( dot ) dk
Disclaimers
- Crispy fried onions recipe translated from Klidmoster.dk.
- OFB grill kindly provided by Otto Wilde for the making of the video at the top of this page.
- The meat used in the video at the top of the page is supplied by Meat Market in Copenhagen.
- Other than the mentioned endorsements above, De Brune Riddere, has not received any kinds of compensation for anything featured on this page.